Use the hosted MCP server (
https://mcp.databar.ai/mcp). We ship new tools, fixes, and API alignment there first, so your client always talks to the current implementation without installing or upgrading anything locally.Add to your AI client
The MCP server URL for all clients:- Claude
- Cursor
The recommended way to connect Claude is through the built-in Connectors UI. This uses OAuth so you never need to copy an API key.
Open Connectors
Open Claude (web or desktop) and go to Settings > Connectors. Scroll to the bottom and click Add custom connector.
Enter the server details
- Name:
Databar - Remote MCP Server URL:
https://mcp.databar.ai/mcp - Leave Advanced settings blank.
- Click Add.
Authorize
Claude will redirect you to Databar to authenticate. Click Authorize to grant access to your workspace, then you will be redirected back to Claude.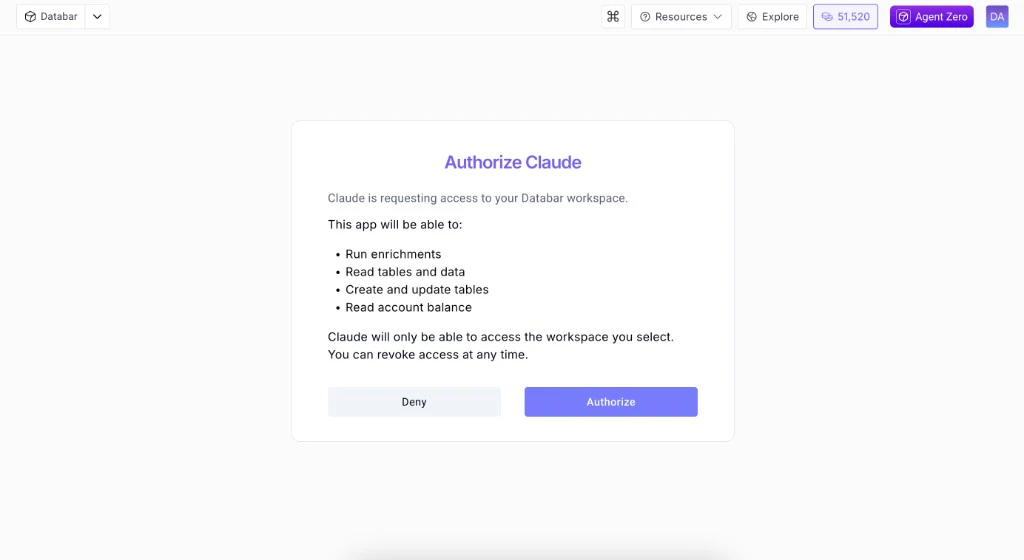
Alternative: JSON config with API key
Alternative: JSON config with API key
If you prefer to authenticate with an API key instead of OAuth, add this to your Claude Desktop config (Restart Claude after saving.
~/Library/Application Support/Claude/claude_desktop_config.json on macOS):Next steps
Available tools
Full list of all 37 MCP tools with descriptions.
Agent Skills
Pre-built workflows that teach AI agents common Databar tasks.
Configuration
Environment variables, safe mode, and caching settings.
MCP Server overview
Full MCP server documentation.